Introduction
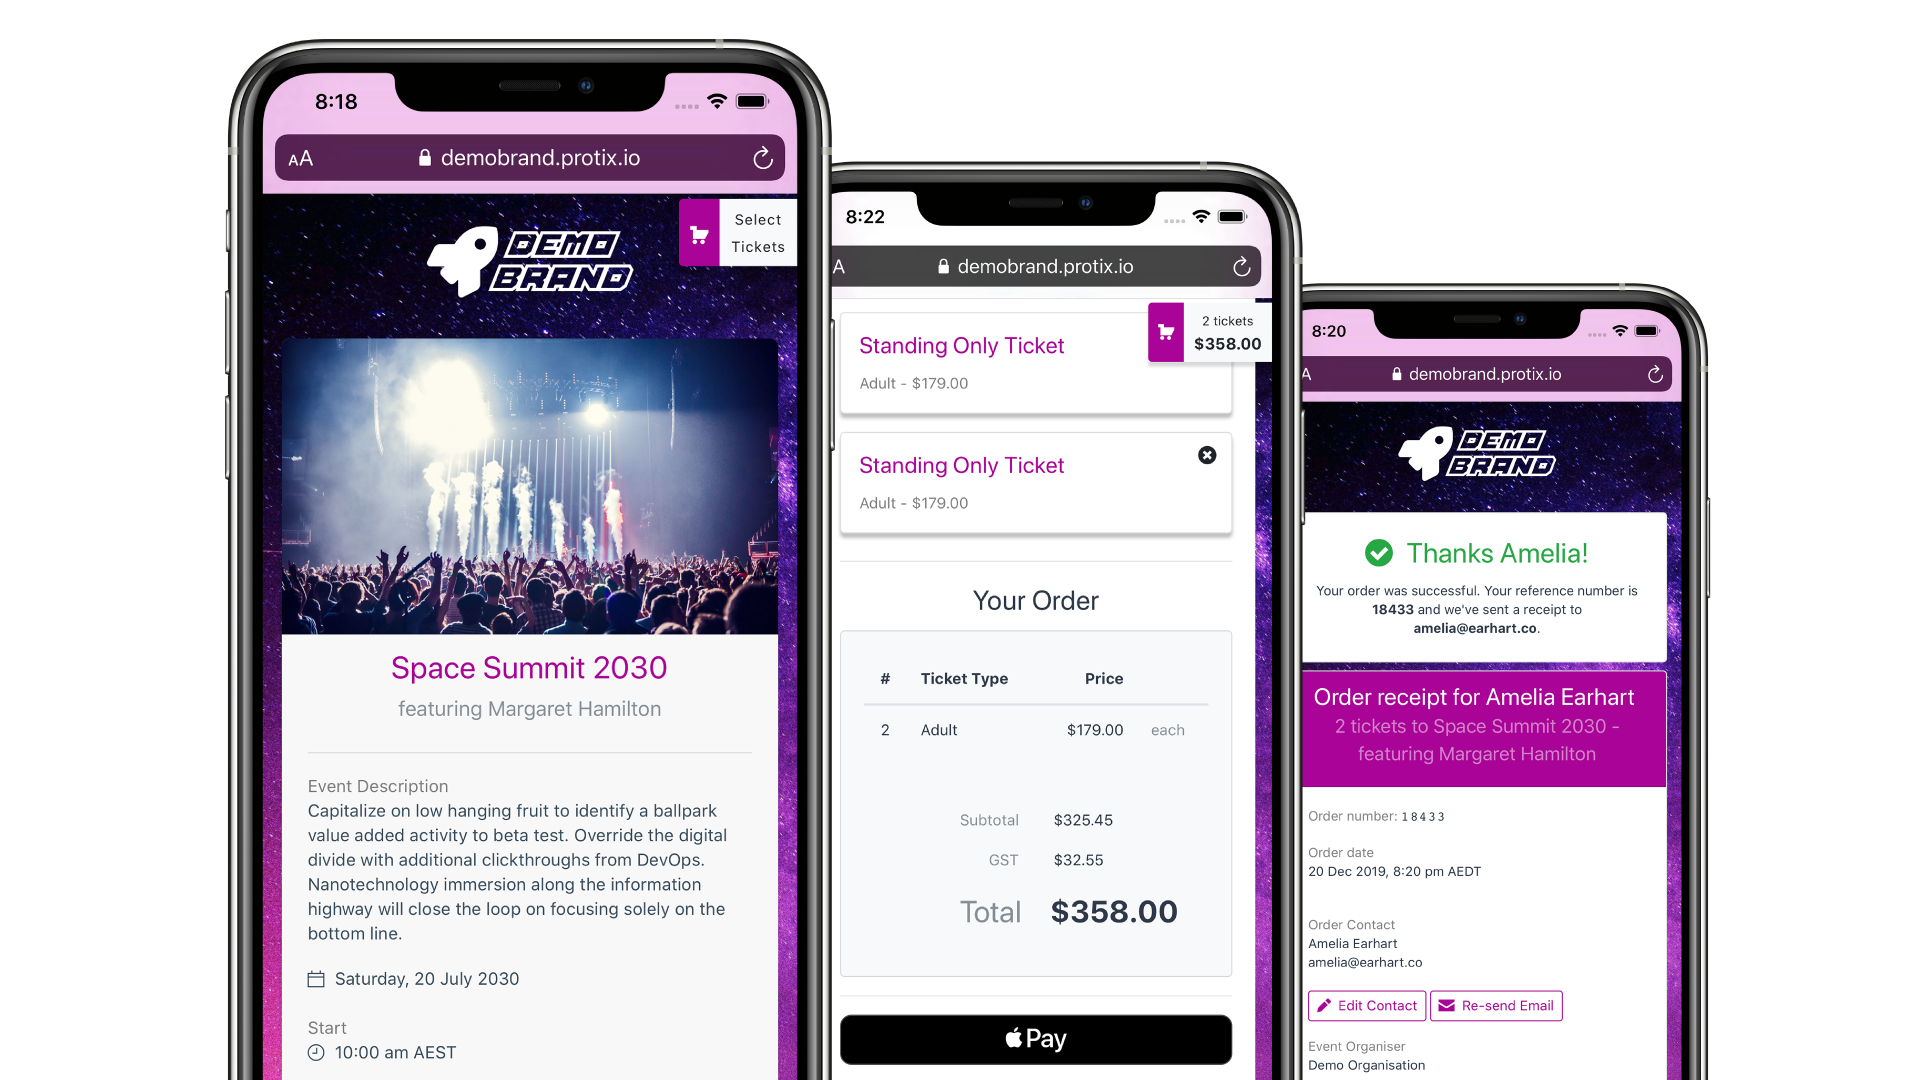
Promptside works behind the scenes to create a seamless event registration experience for your audience, where your brand is front-and-centre.
To get started, sign in to your Promptside account.
Organisations
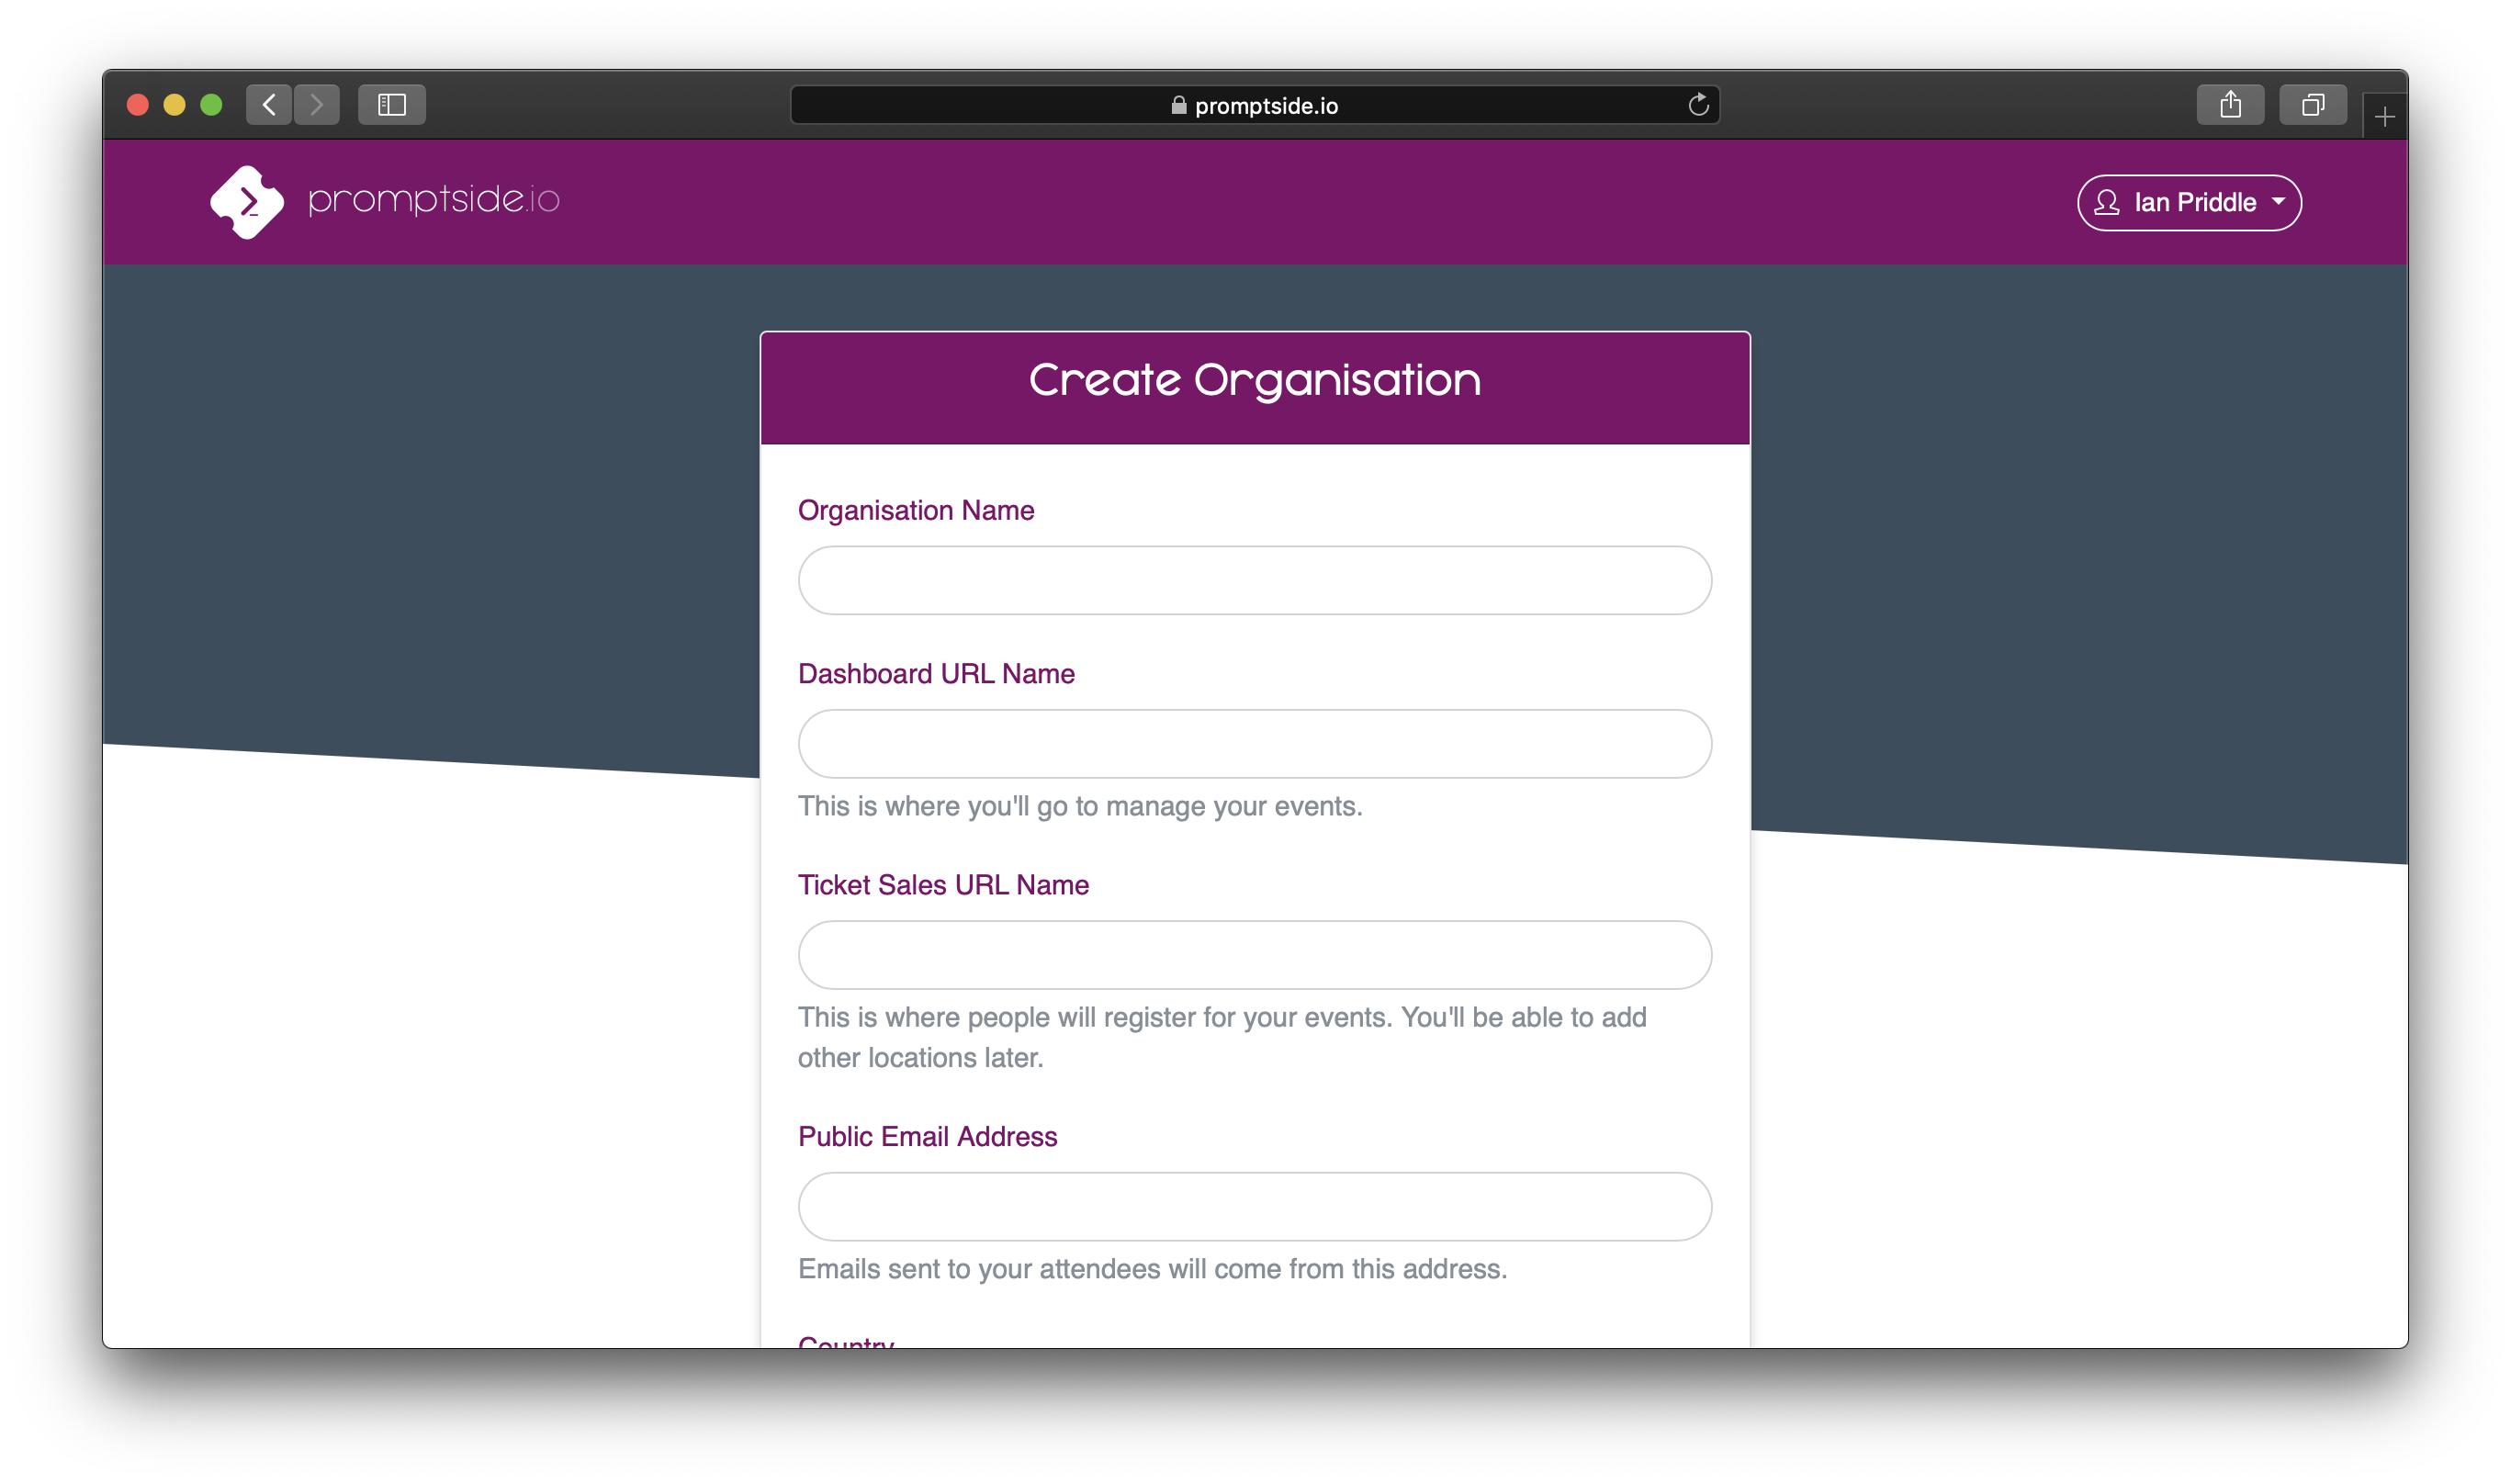
Before you can create an event in Promptside, you'll need to register your organisation.
- You can set up as many organisations as you like, and manage them from a single user account.
- You can invite other users to help you manage your events. Each organisation can have an unlimited number of users.
Brands
In Promptside, a brand is a collection of settings and visual assets that control what your audience will see when they register for an event. Each Promptside organisation can have an unlimited number of brands. You might create a separate brand for each event you run, or use a single brand to give a consistent presentation to all your events.
A brand determines:
-
The URL of your event registration page.
Each brand has its own domain name on the web. Promptside can set up a domain automatically, which looks likeyourbrand.protix.io. Or you can choose to connect your own custom domain name, such asevents.yourbrand.com. -
The appearance of the event registration page.
These pages start with a neutral, white appearance. Change this by setting a color scheme, logo or background image. -
The content and appearance of emails that your audience receives.
Promptside can send order confirmation and ticket issuance emails on your behalf. As well as changing the appearance of these emails, you can override the body copy by providing a custom template. -
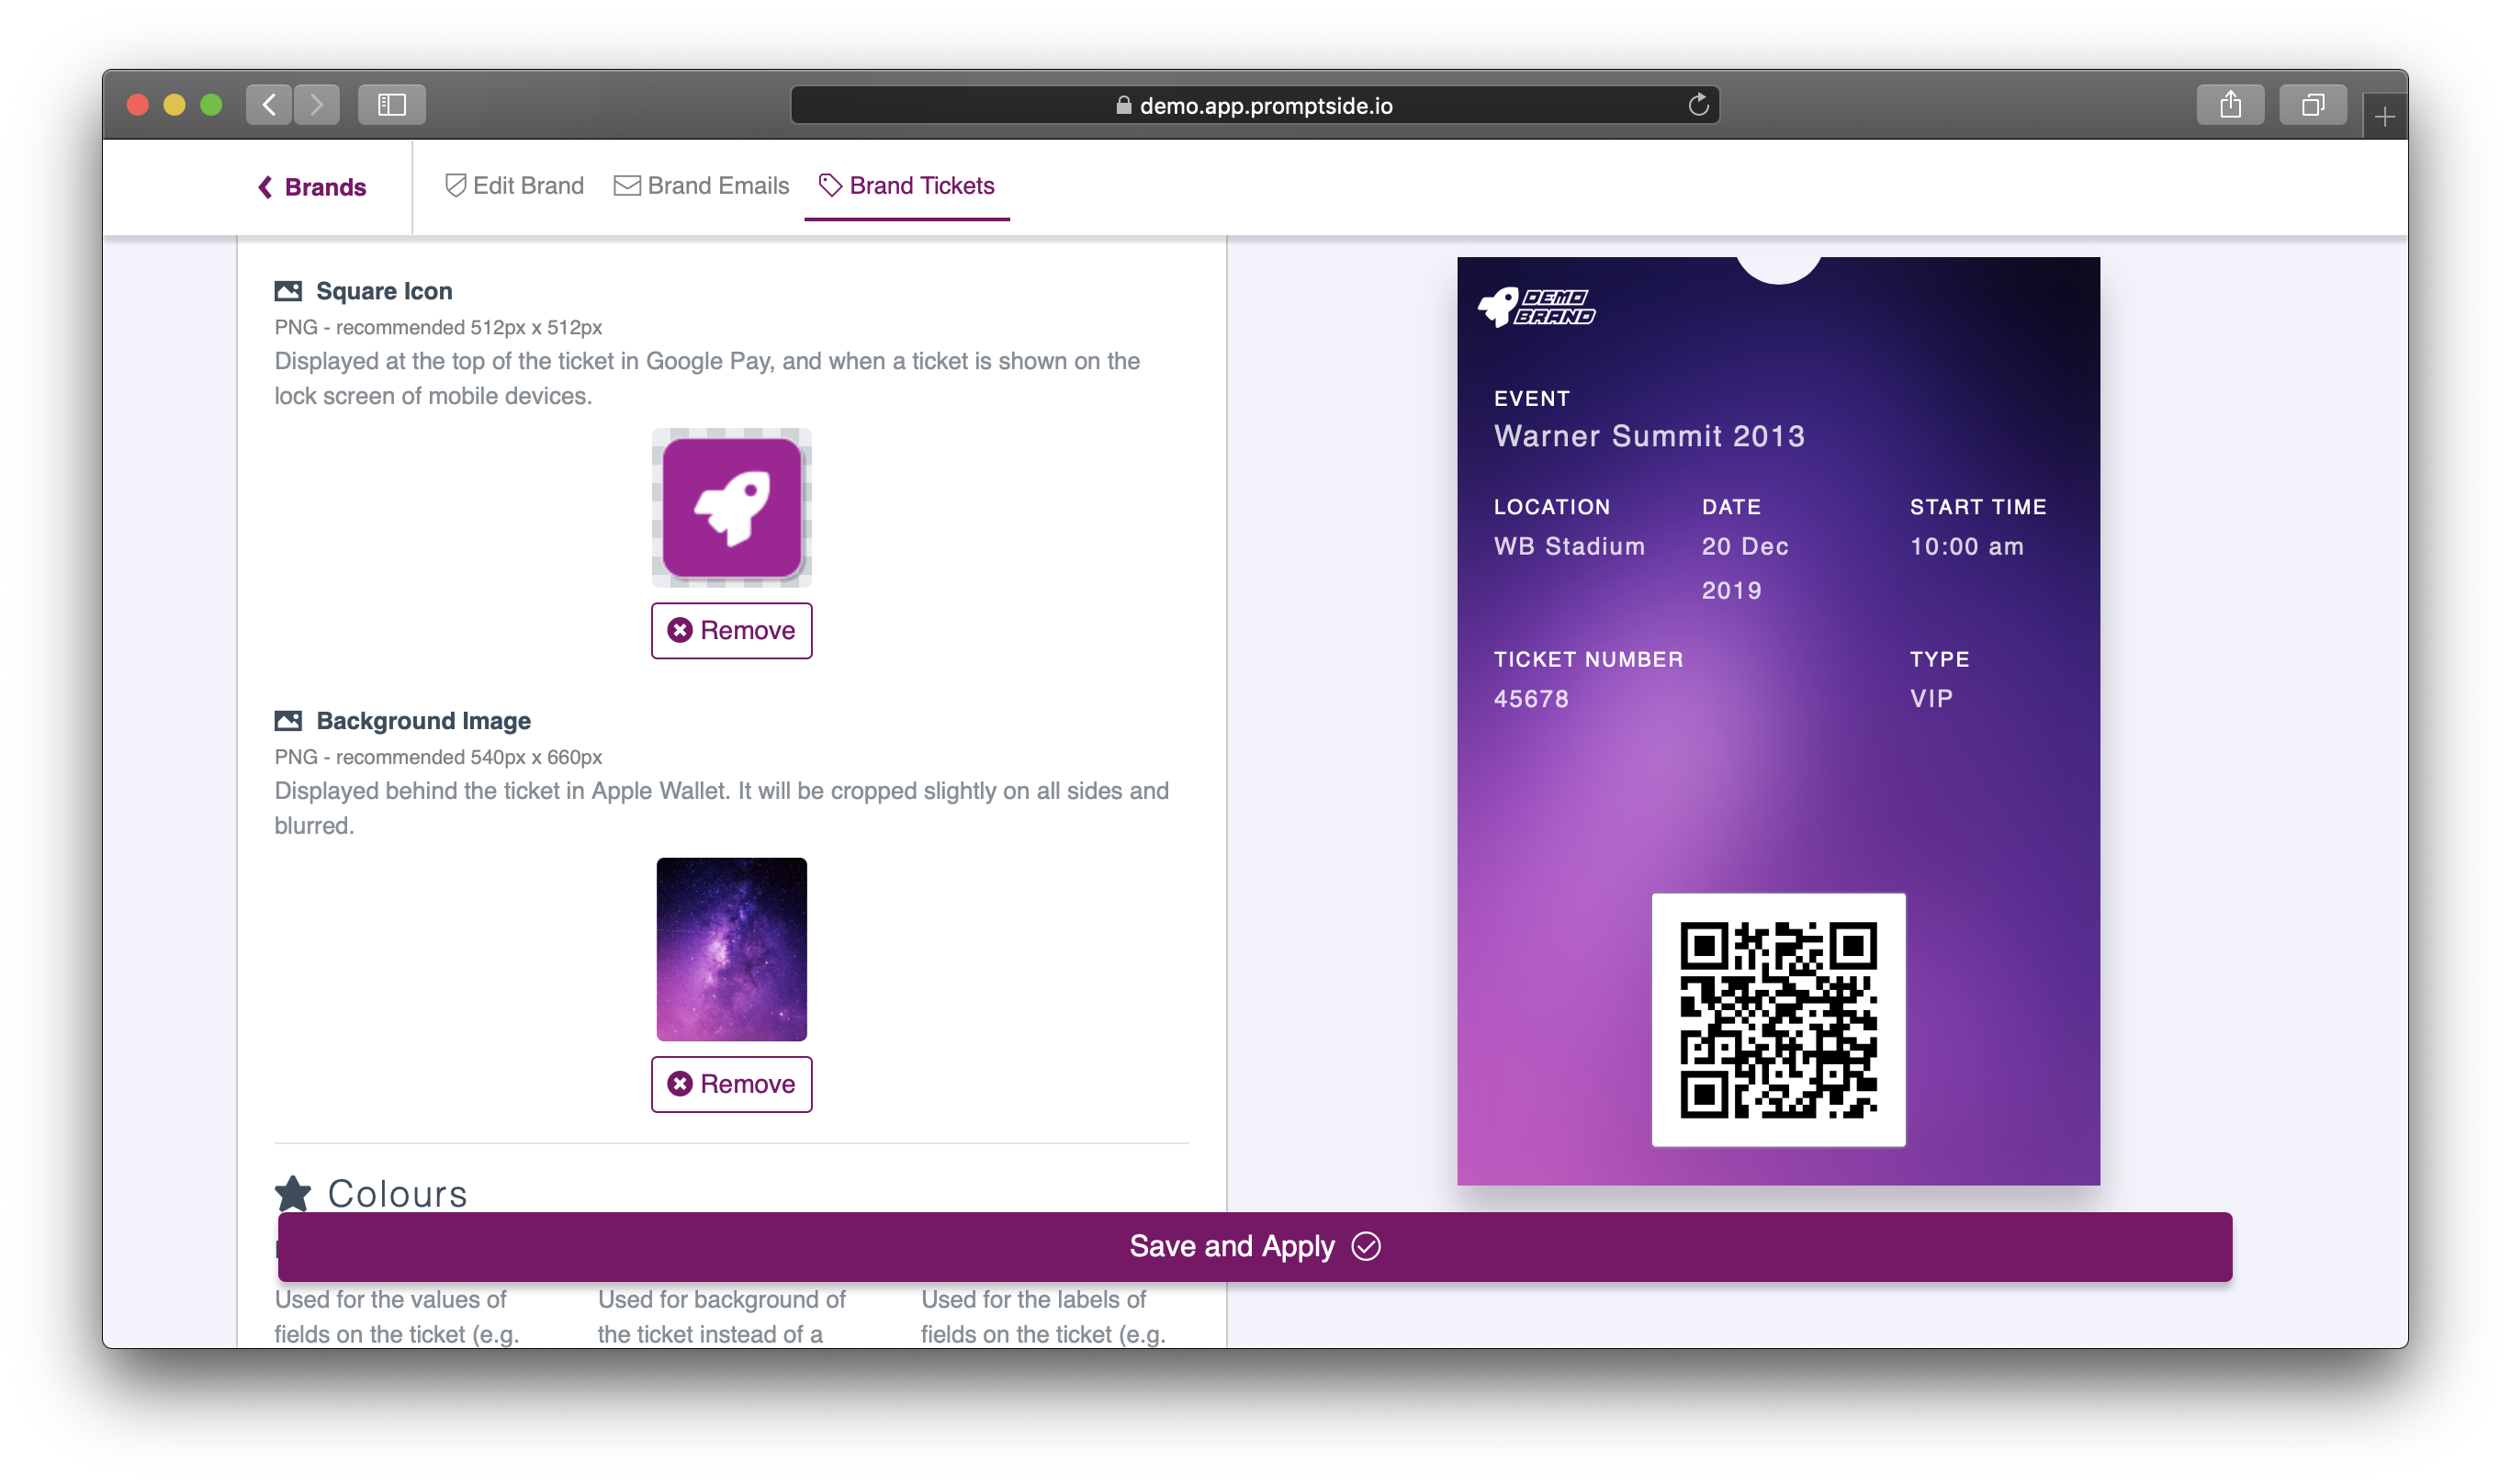
The appearance of digital tickets that your audience receives.
If you choose to enable it, Promptside can generate passes for attendees to store in the Apple Wallet or Google Pay apps on their mobile devices.
Payment Processing
If you need to sell tickets to a paid event, Promptside provides a fast and secure checkout flow for your customers. All major credit and debit card brands can be accepted, as well as Apple Pay and Google Pay in supported browsers.
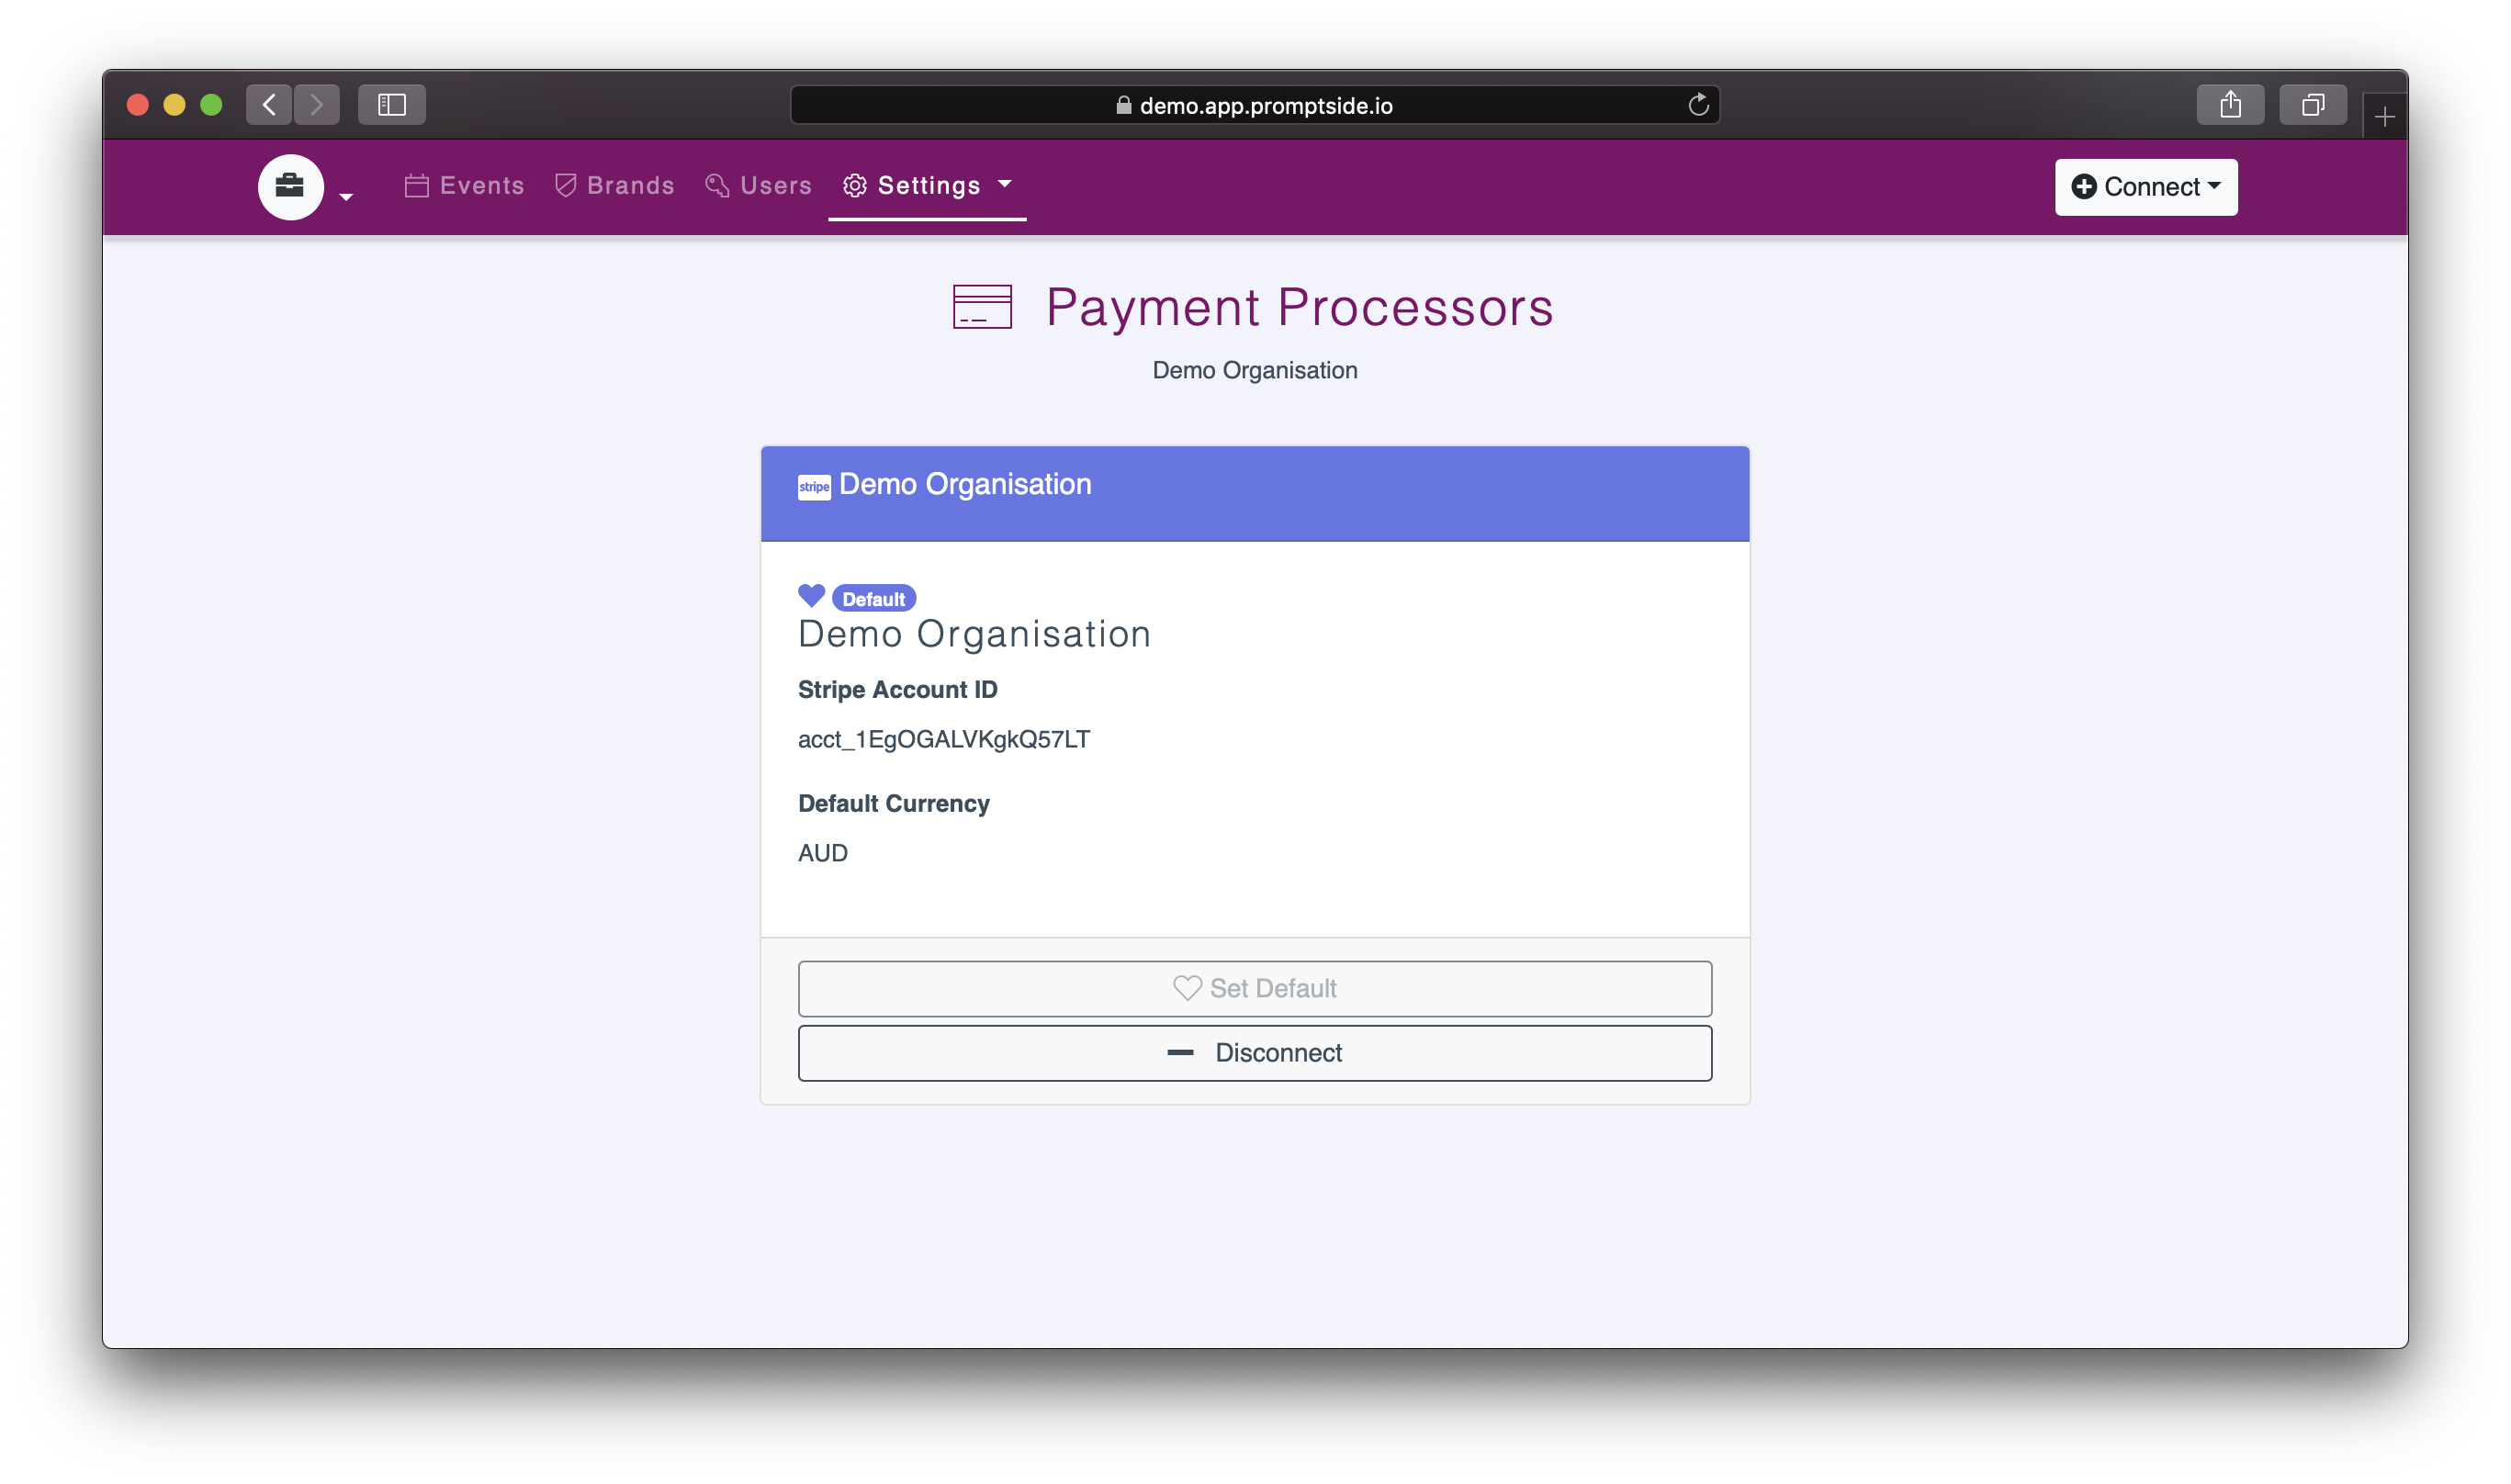
To sell tickets, you need to link a payment processor to your Promptside organisation. A payment processor is responsible for charging credit cards and depositing the funds in your bank account.
Currently, Promptside integrates seamlessly with Stripe for payment processing, and will guide you through the process of creating a Stripe account for your organisation if you don't have one.
Events
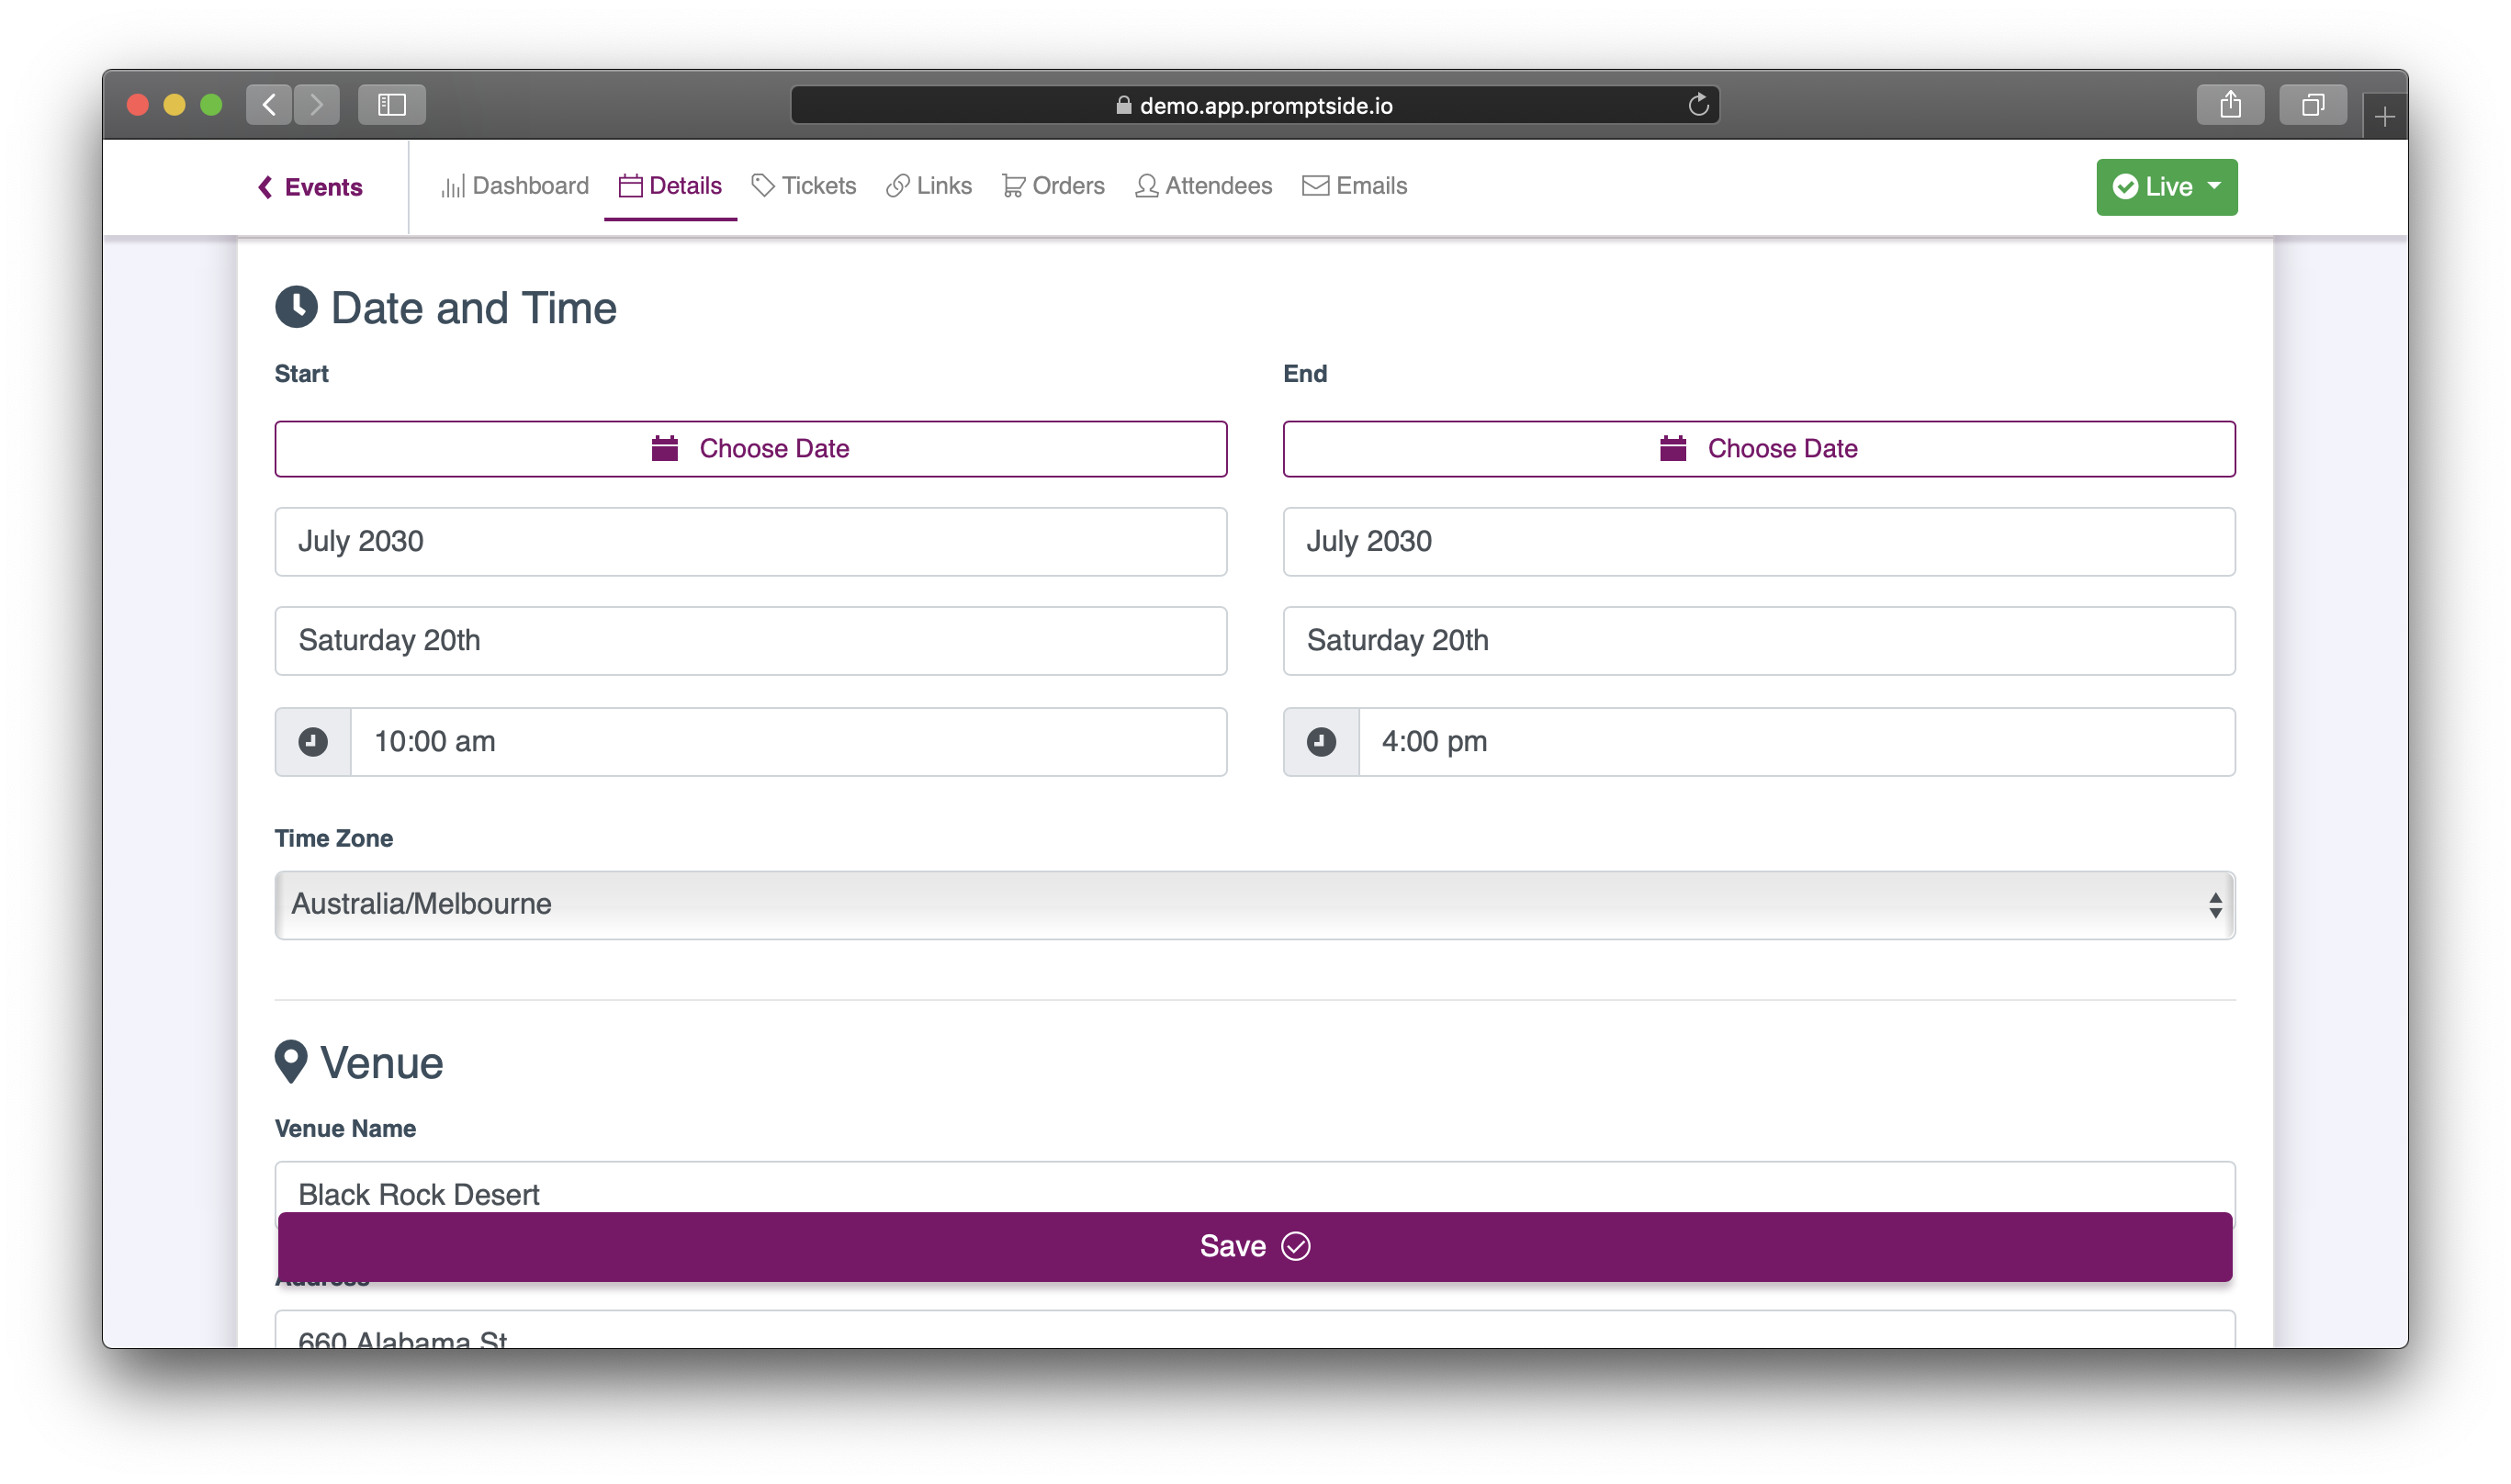
To set up a new event in Promptside, you need to provide the date and time when it will start and end, and give the event a title. Optionally, you can also provide:
- Extra information that your audience will see, like a subtitle, descriptive text, venue details, web links, and a promotional image
- Payment and tax options, if your event has paid tickets
- A choice to make the event private, if you plan to provide the registration link directly to invitees, and don't want the page to be indexed by search engines
Newly-created events start out in draft mode. You can continue to change most settings, and you can preview the event registration page, but it won't be visible to the public. Once you're ready, you can open your event for registration by publishing it.
Ticket Types
Promptside gives you simple and advanced ticketing options to suit the needs of your event.
-
Simple ticketing
If your ticketing needs are straightforward, just enter the capacity of your event, and create a single ticket type with a fixed price. -
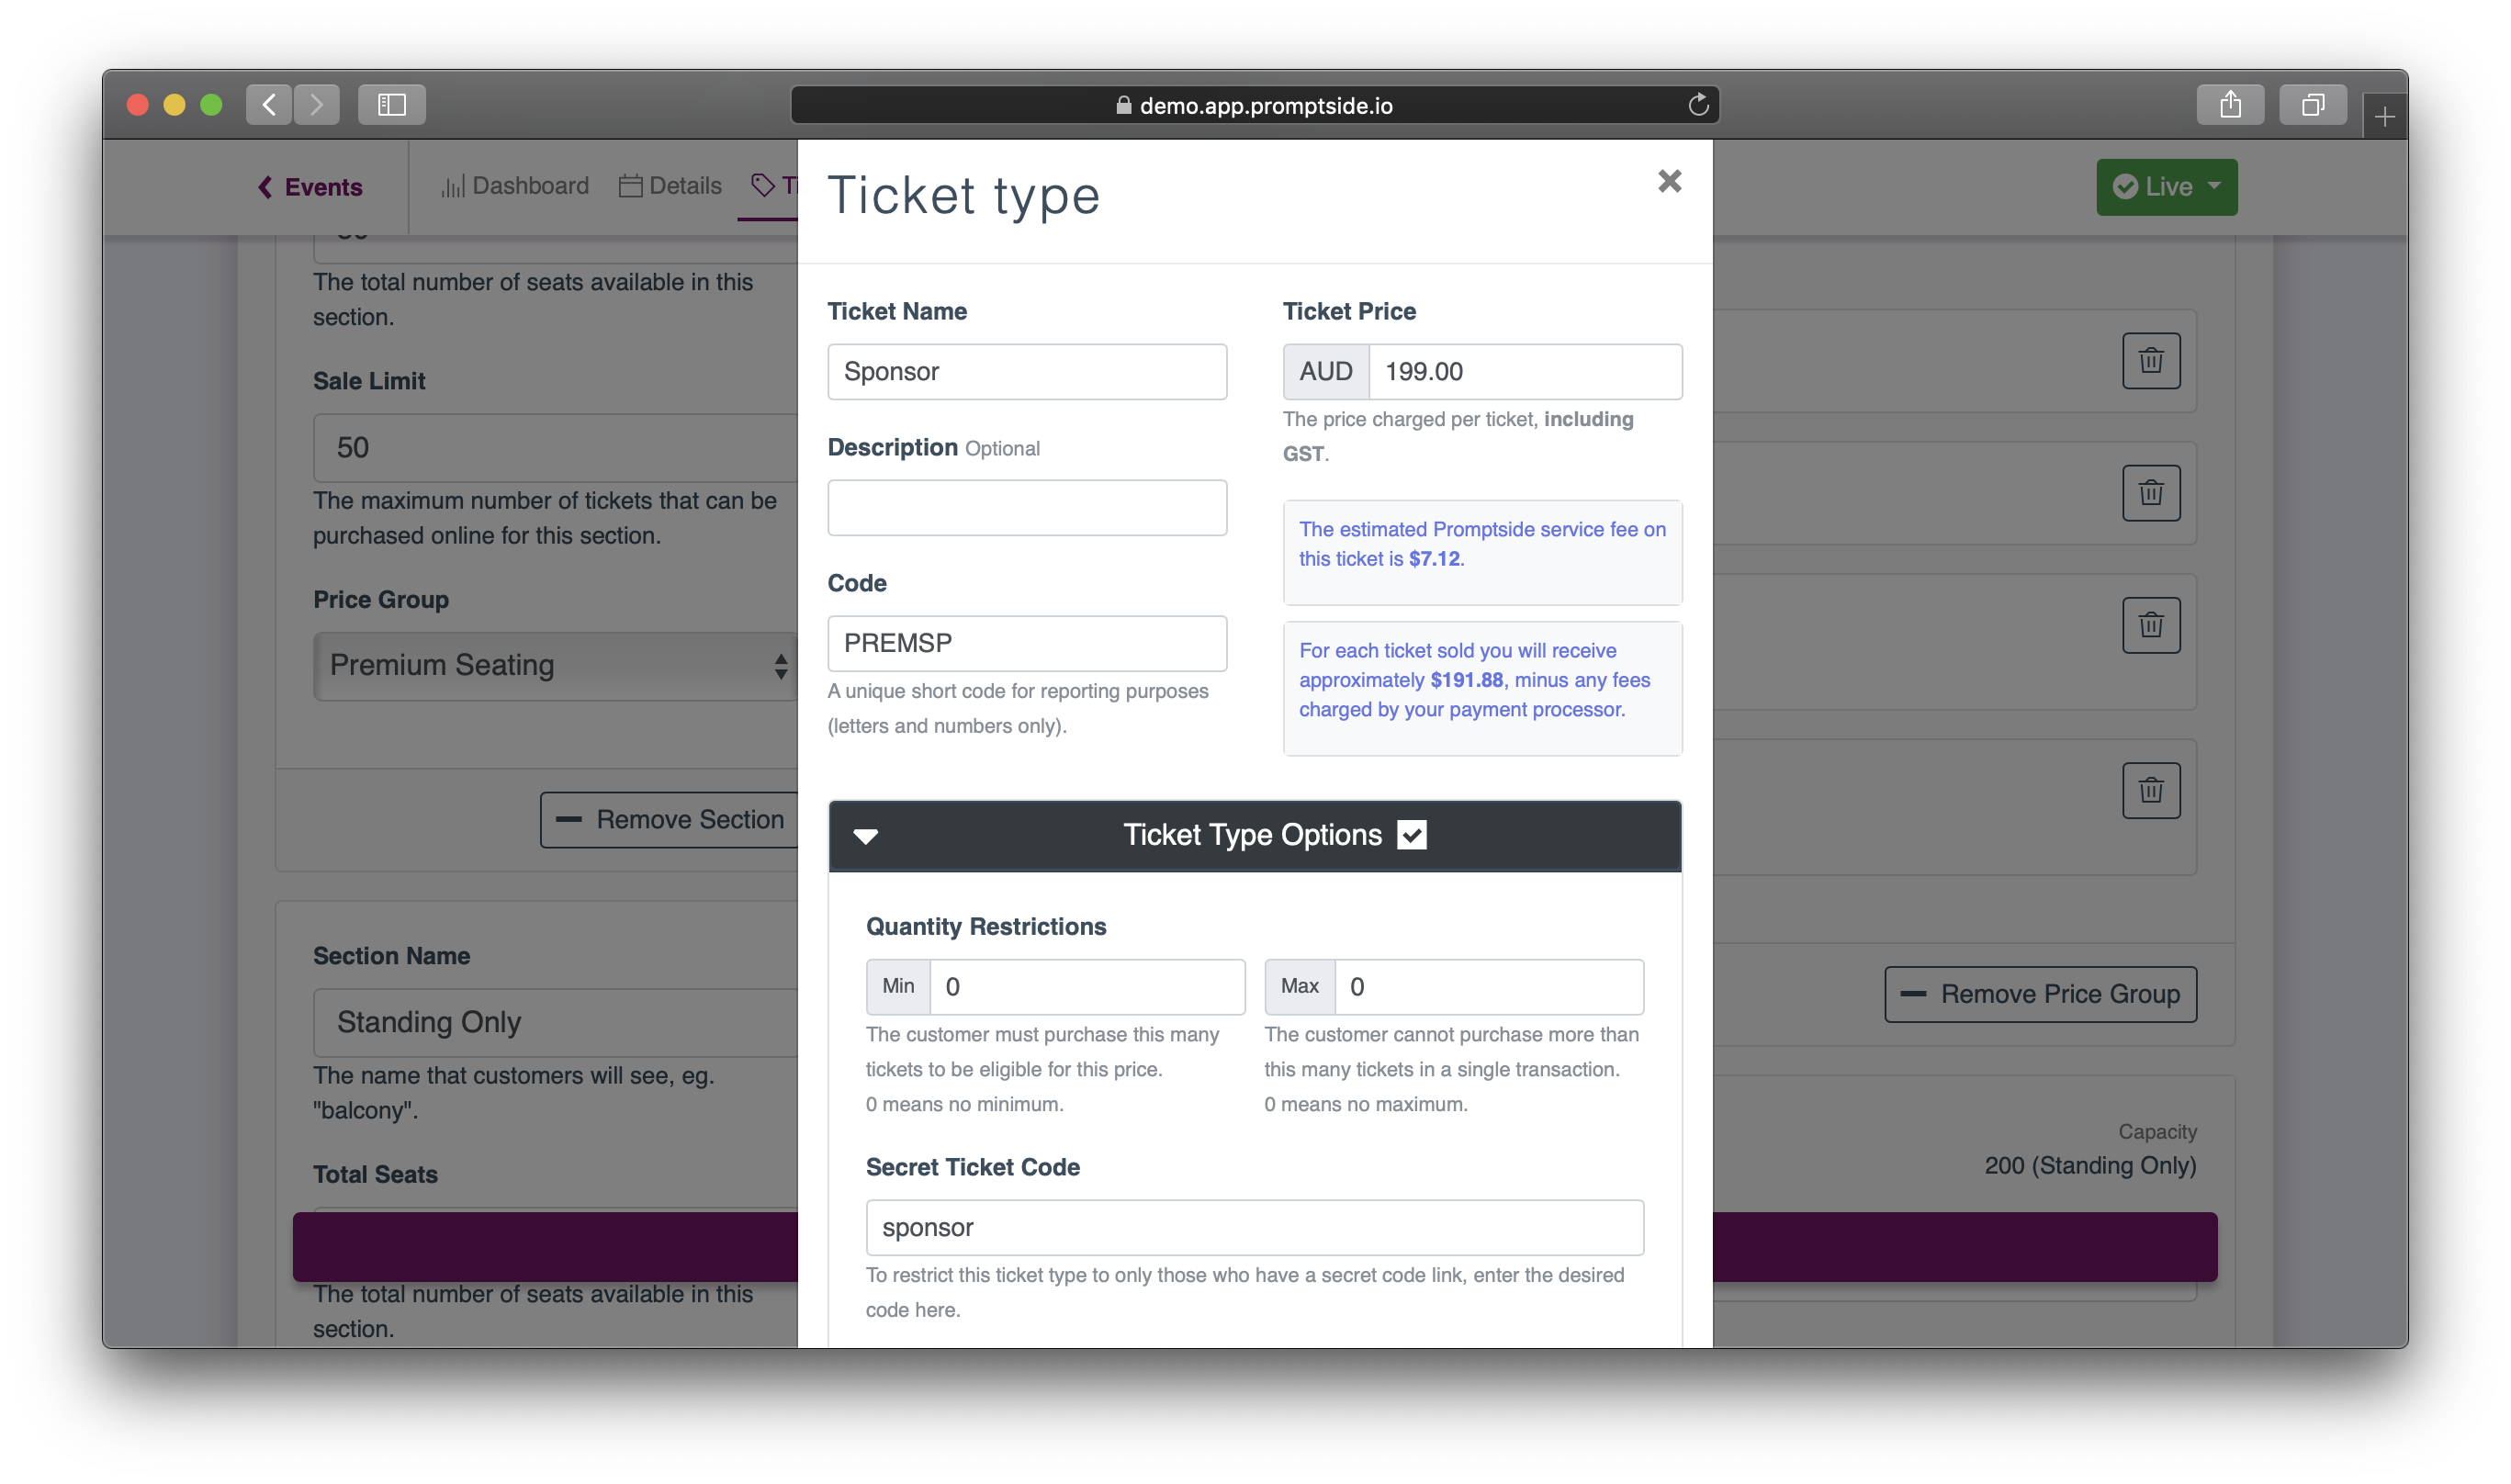
Ticket types and quantity rules
You can set up multiple ticket types with different prices, for example “Adult”, “Child” and “Group Rate”. You can set a minimum or maximum quantity that your customer must purchase to be eligible for a particular ticket type. -
Seating sections
You can set up multiple seating sections with different capacities, for example regular seats and premium VIP seats. Each section can have its own set of applicable ticket types. Multiple sections can share the same pricing by using a price group. -
Discount codes
You can choose to make certain ticket types visible only to those with a secret code. You might use this for a promotion, a pre-sale, or to offer special tickets to a restricted VIP audience.
Orders
When a customer registers for your event, Promptside ensures there are tickets available, and reserves them by creating a self-service order. If the order requires payment, Promptside charges the customer's payment method, then marks the order as paid. If the payment fails, the order is cancelled and the tickets are released.
As an event manager, you can also create manual orders on behalf of your customers. Manual orders have some special features:
- You can create manual orders even when your event is not on sale to the public (before it's published, or after the registration deadline)
- A manual order can include tickets that aren't available to the public (manual-only ticket types)
- A manual order will ignore capacity and quantity restrictions (so you can manually issue tickets to a ‘sold out’ event)
- You can choose not to send an automatic order confirmation to the customer (perhaps you plan to issue a receipt manually)
- You can create a manual order without payment, then add a credit card payment at a later time, or accept payment offline and manually mark the order as paid
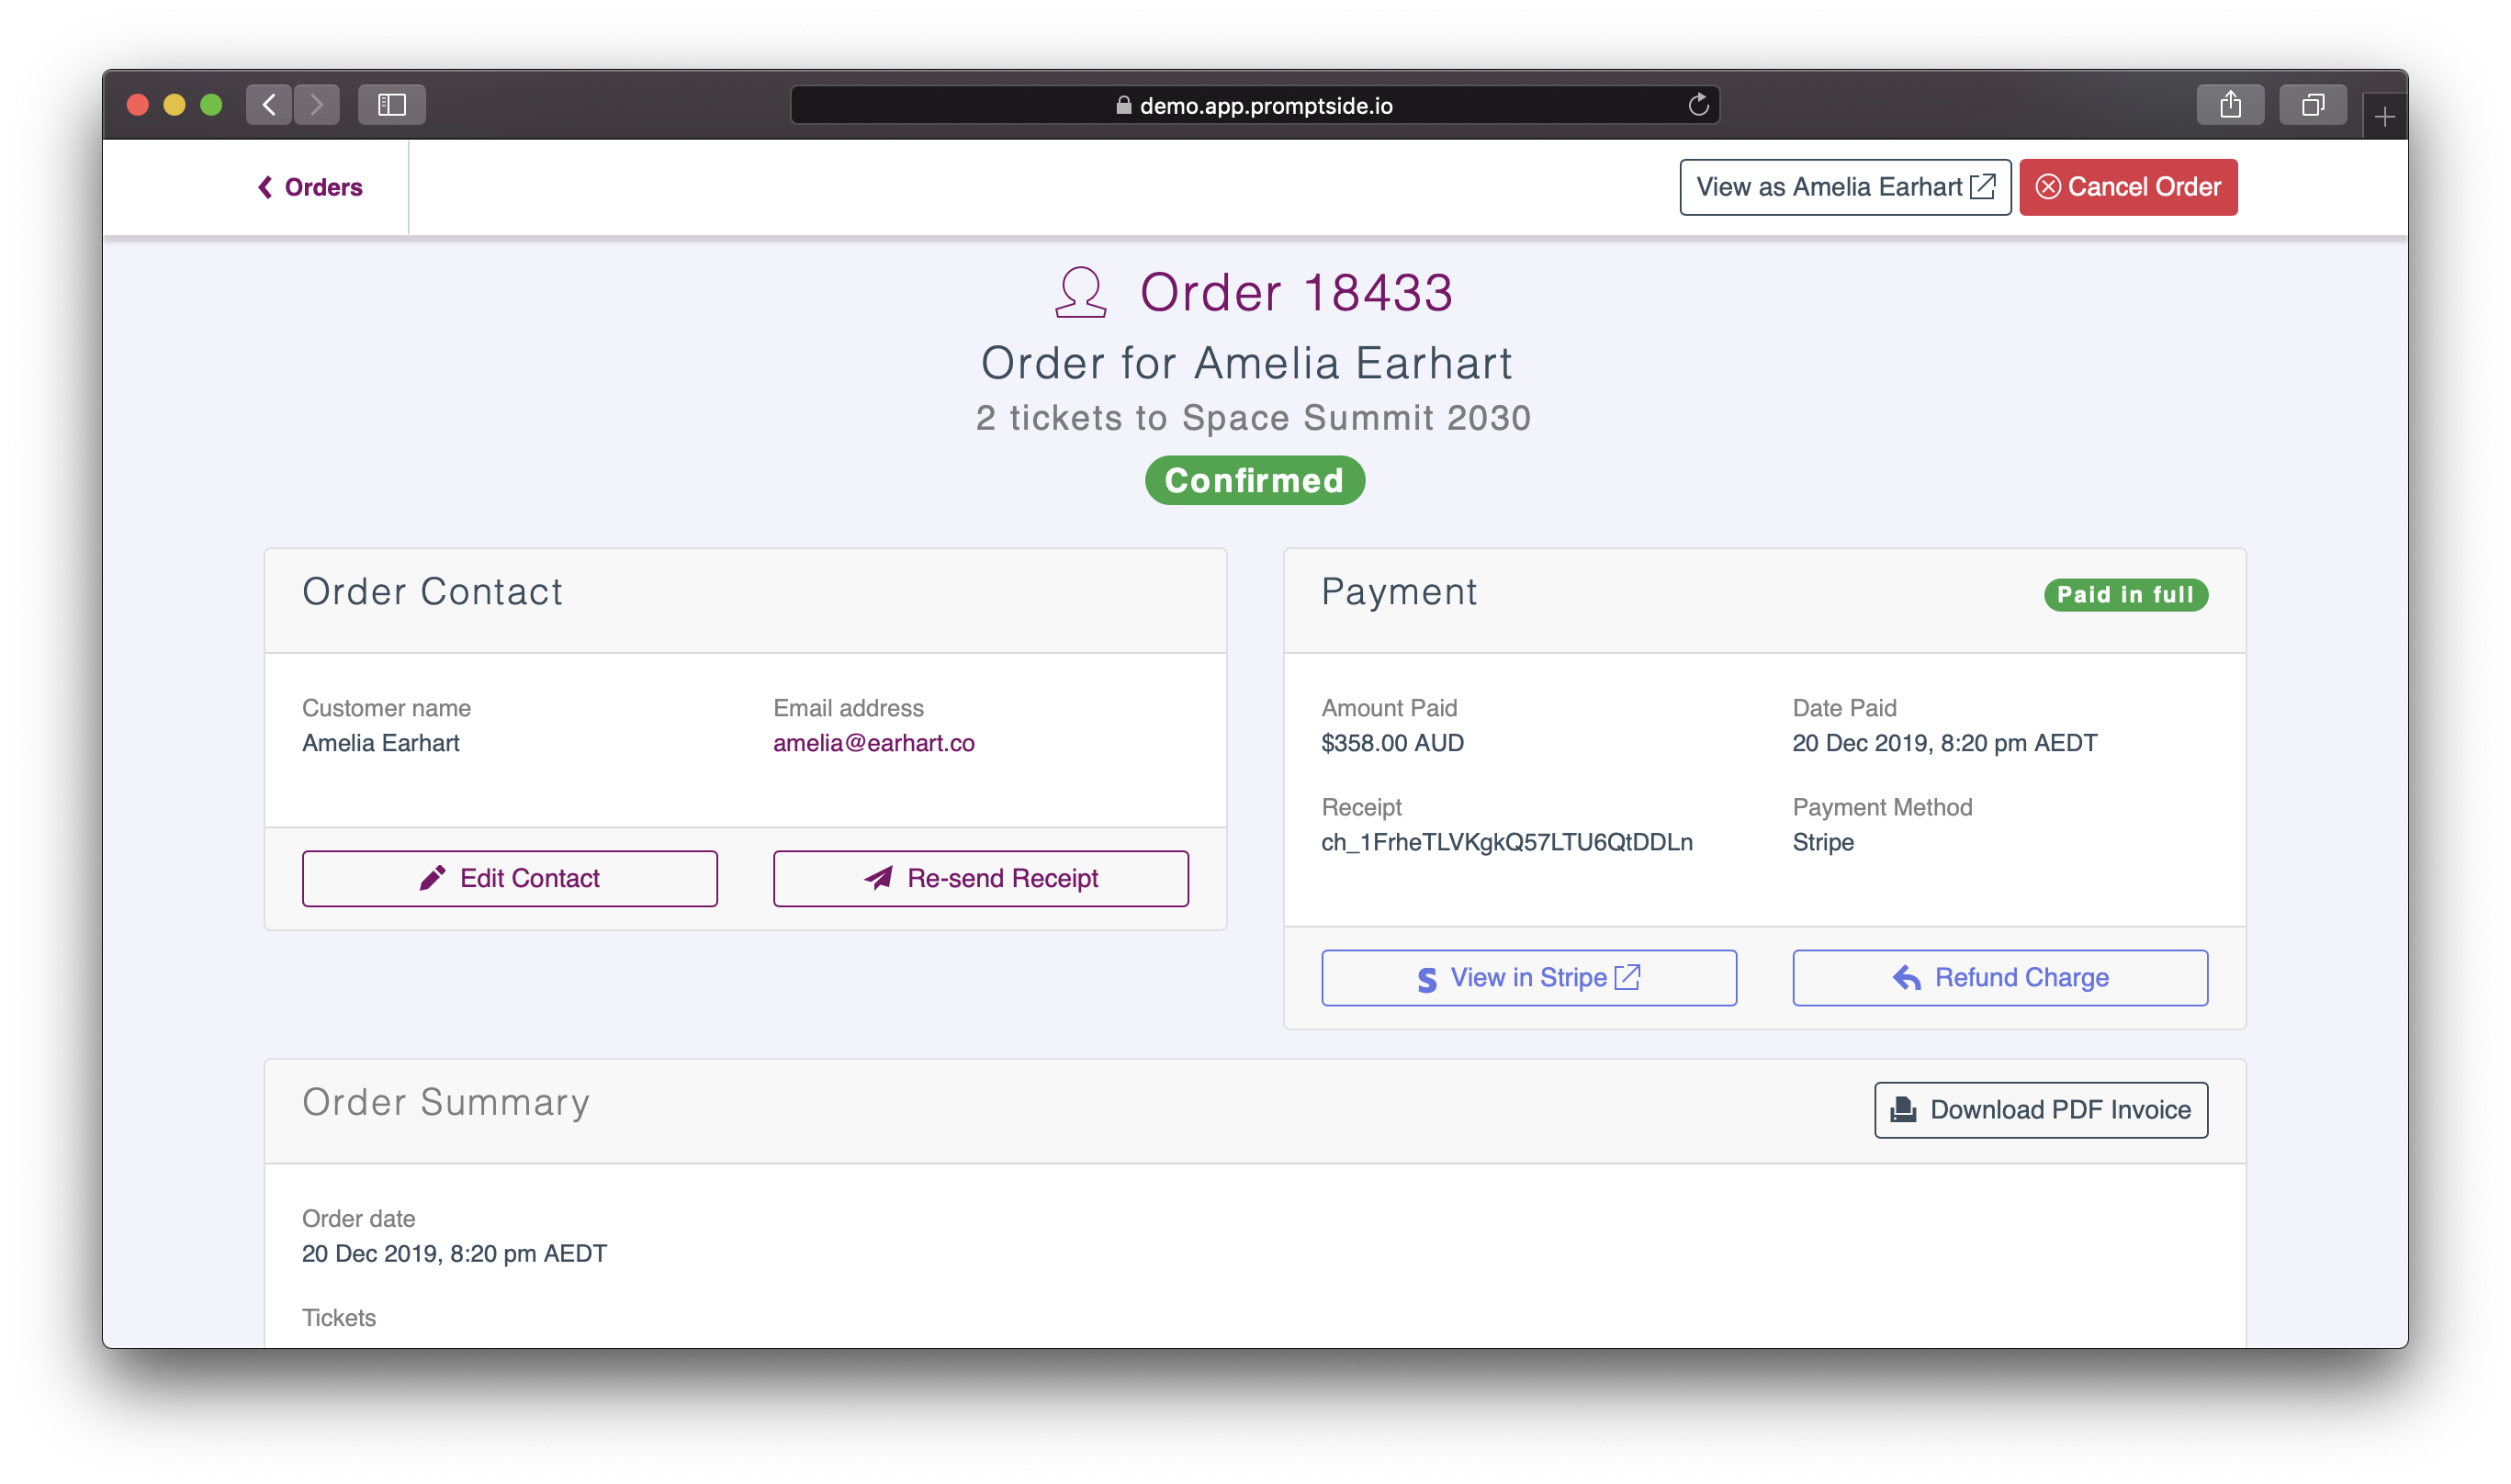
Promptside provides an order dashboard where you can view or modify all the orders for your event.
- Search and filter order details, or export them to a CSV file
- Edit the contact details on an order
- Generate a PDF tax invoice for an order
- Manually cancel an order
- Issue a refund
Attendees
Once tickets are reserved by a customer, they can be allocated to attendees. Each ticket can have an attendee name, contact details, and special requirements recorded against it.
- By default, your customer only needs to select the desired type and quantity of tickets to place an order. They can allocate their tickets to attendees later.
- Each attendee will receive an email with their personal ticket attached, and information about the date, time and location of the event.
- If you want your customer to provide the names and email addresses of all attendees before placing their order, you can turn on the “Require attendee names before purchase” option.
Check-In
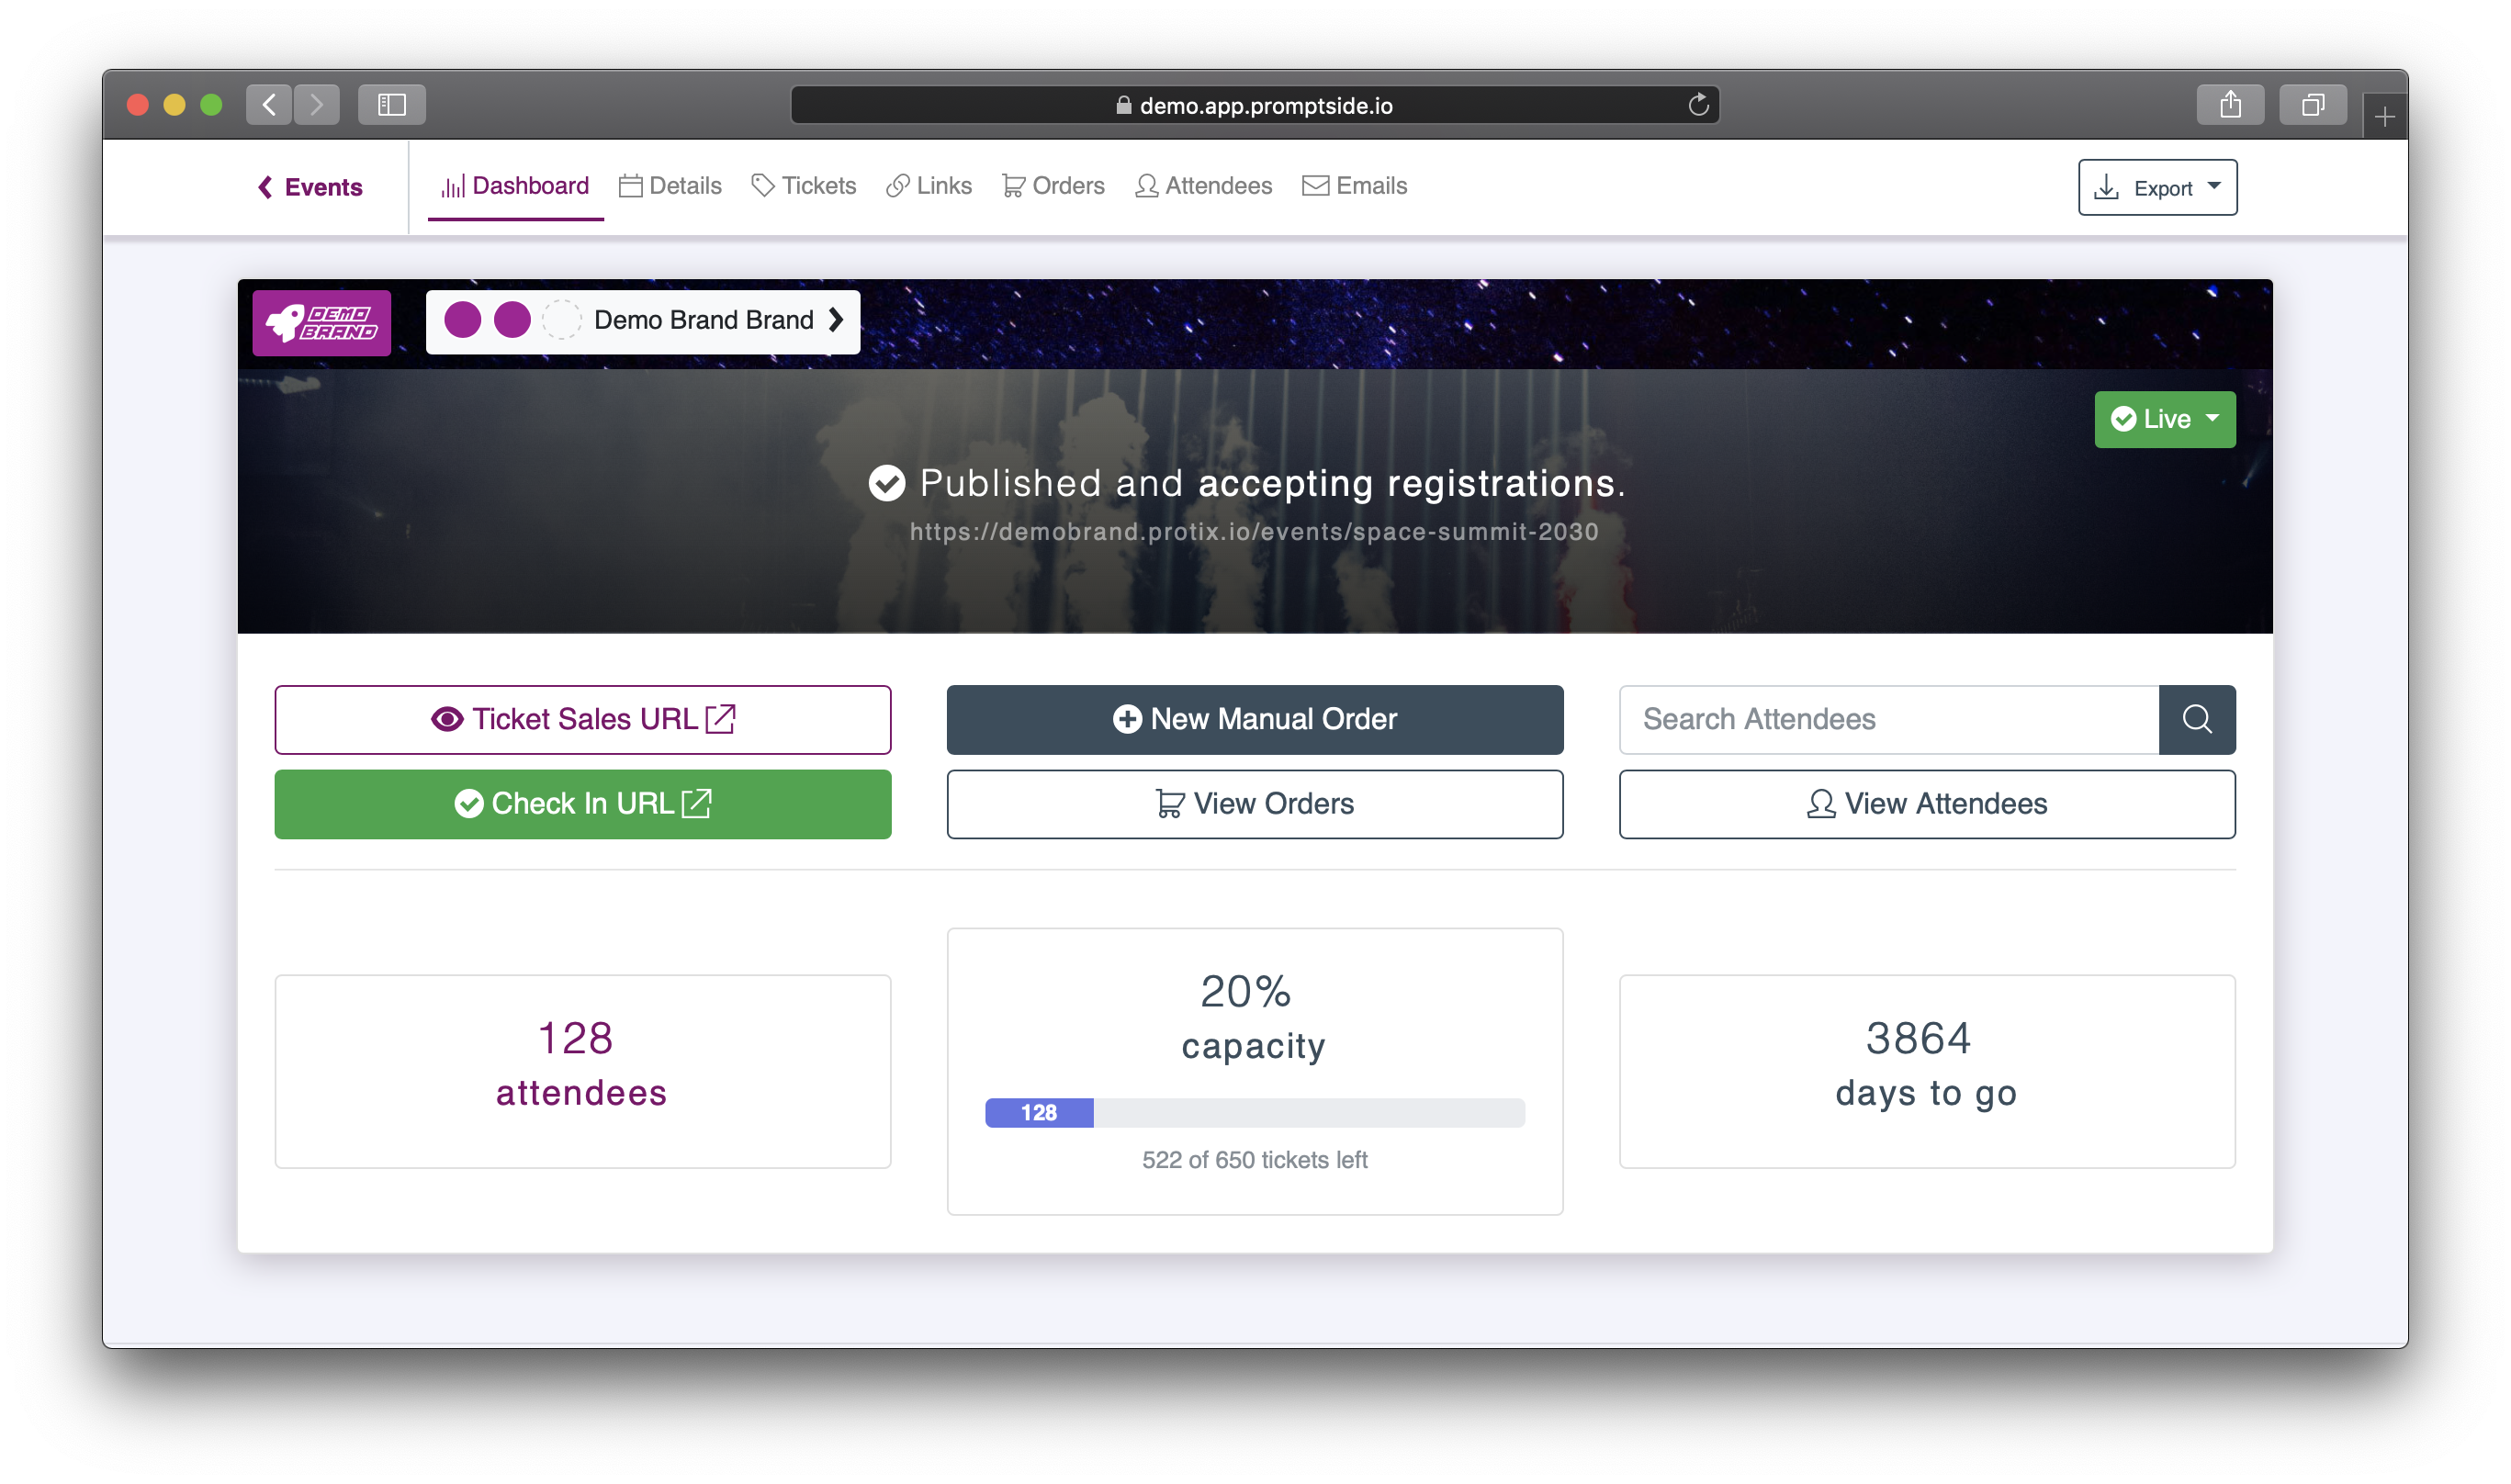
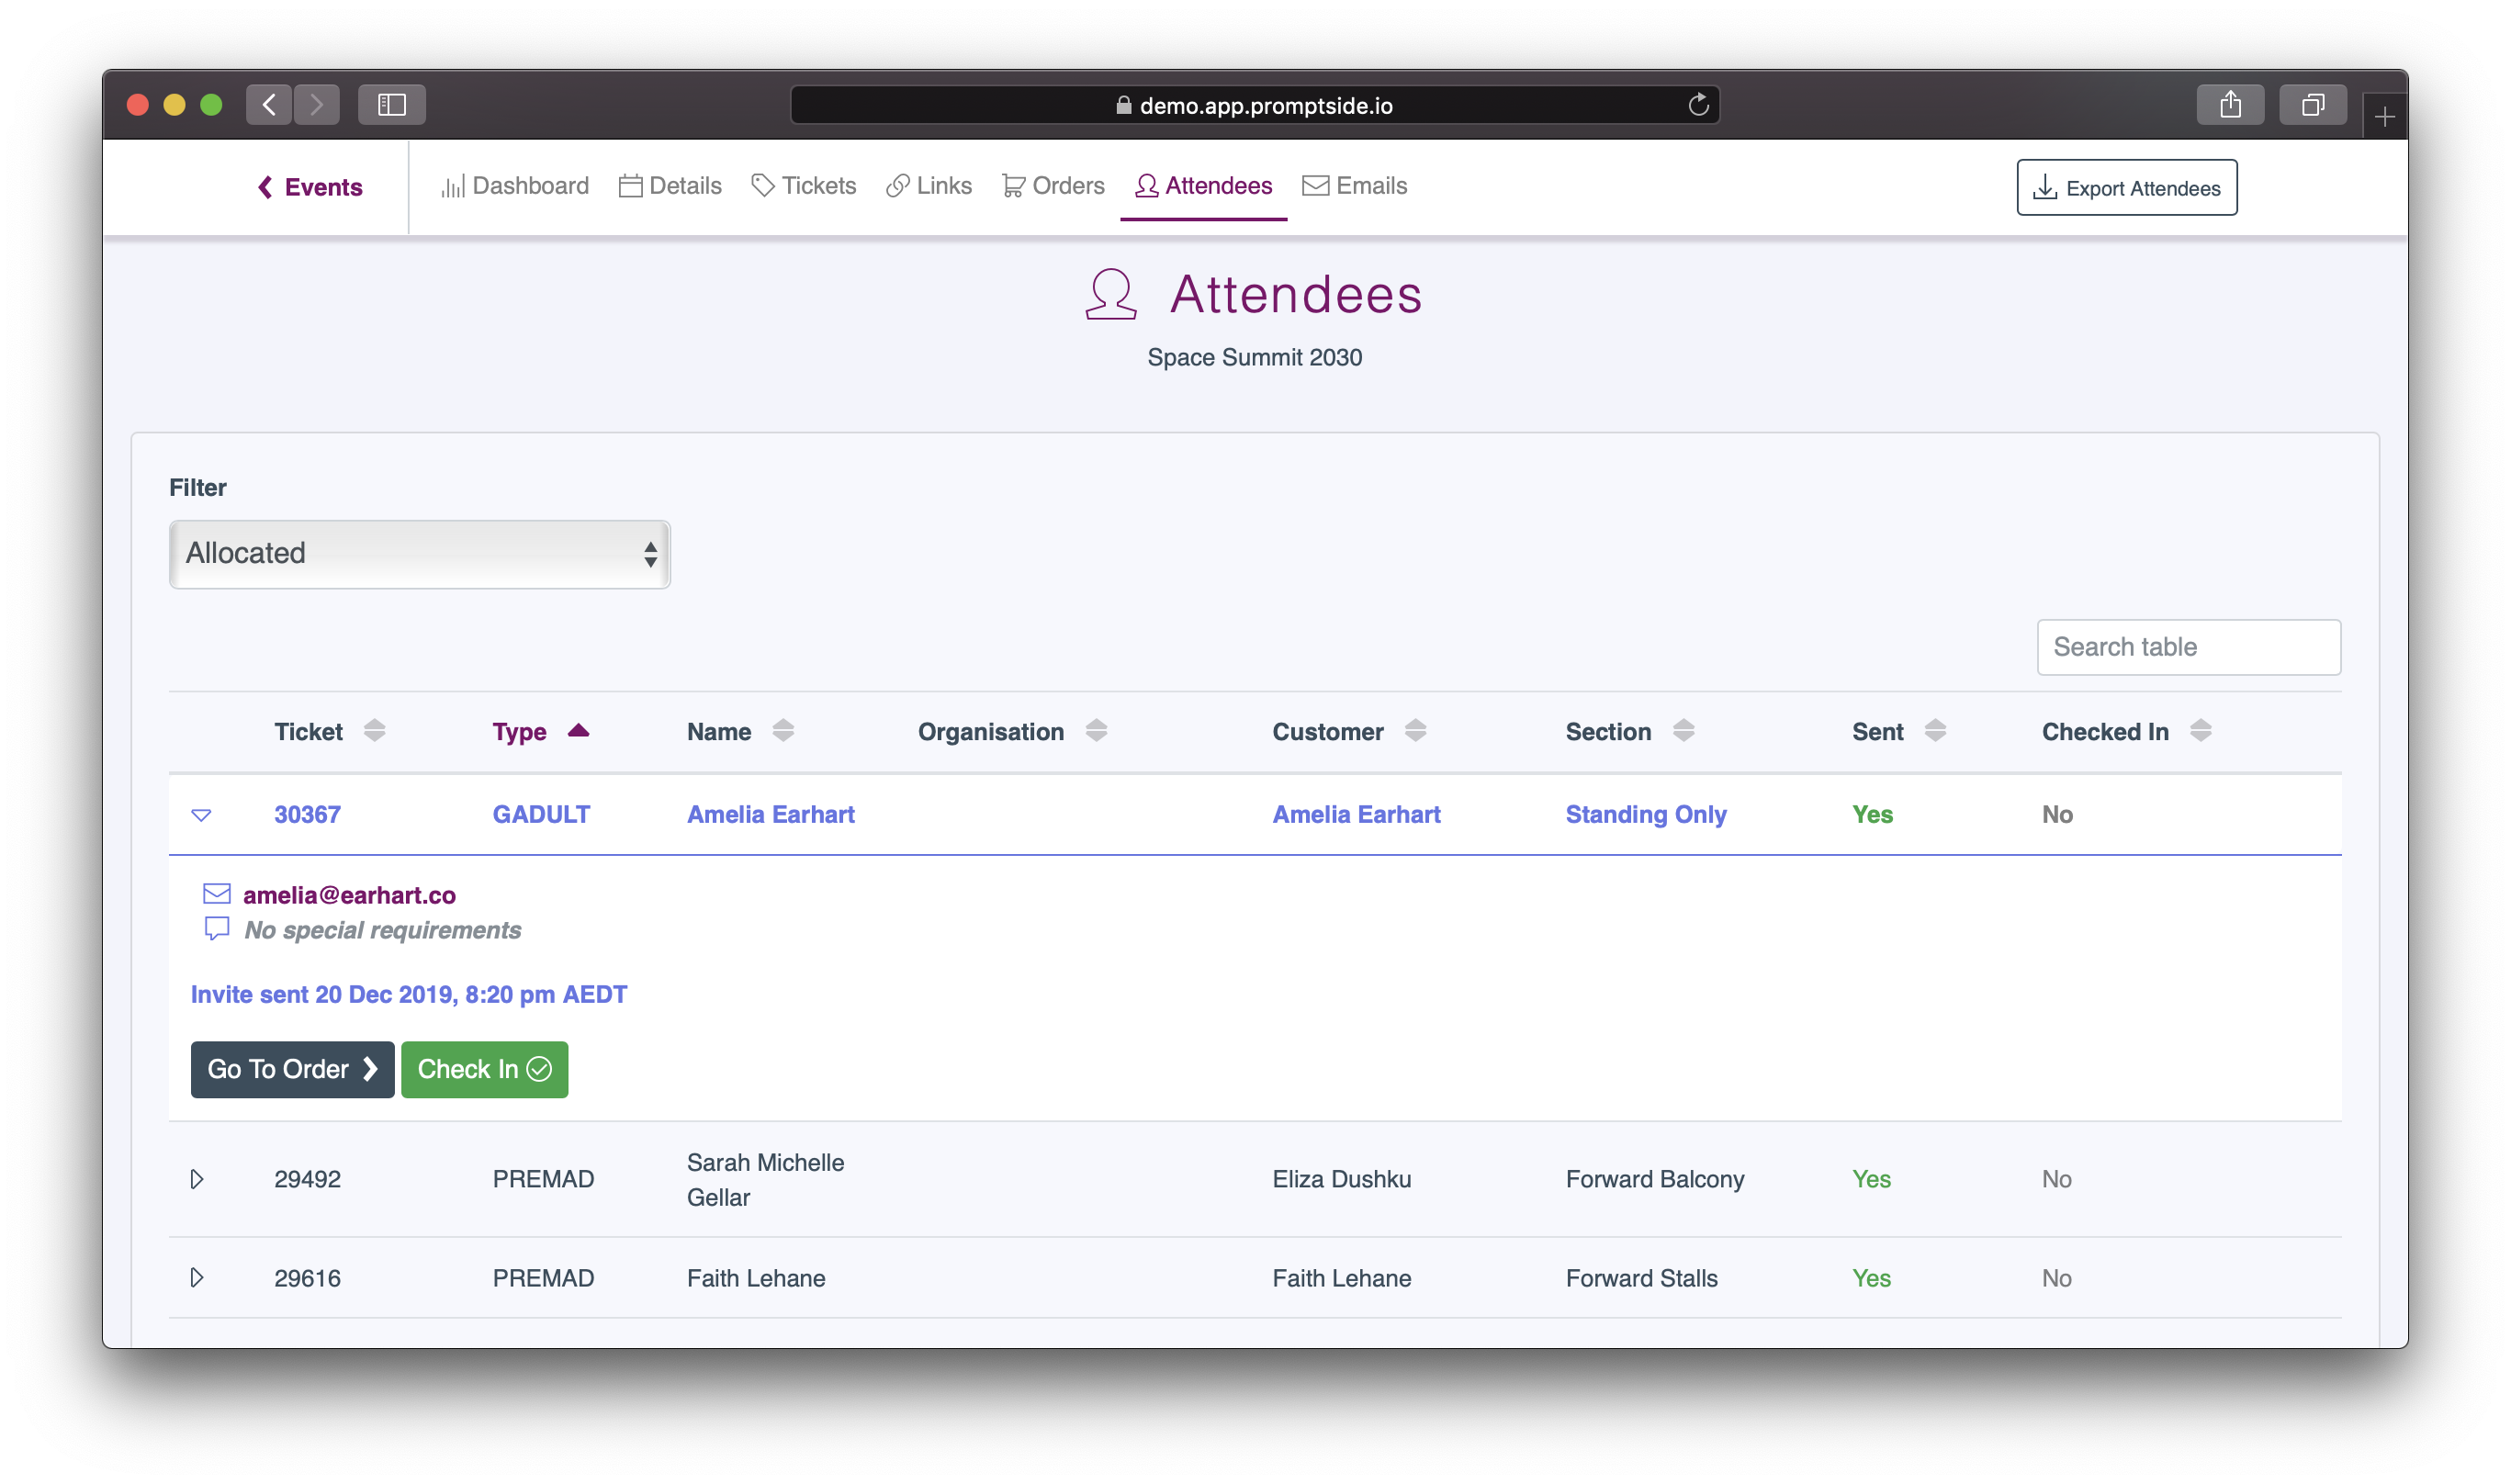
Promptside provides an attendance dashboard where you can see all the people who will be attending your event.
- Look up attendees by ticket number, attendee name, customer name (the person who placed the order), email address or organisation
- Export attendee names, contact details, and special requirements to a CSV file
- Report on tickets that have been reserved by a customer but not yet allocated to an attendee
When your attendees present their tickets at the venue, you can check them in using the web check-in app, the mobile check-in app for iOS, or the attendance dashboard.
- Check a ticket in by entering the ticket number, or by scanning the ticket barcode using your device's camera (if using the mobile app).
- Promptside will let you know right away if the ticket is invalid, voided or already checked in.
- The web and mobile check-in apps are designed so that they can be easily provided to venue staff without granting full access to Promptside. Just give the staff your unique event access code, and they'll be ready to start checking tickets.
Build even more advanced functionality using Promptside's powerful developer APIs.
Learn more